
 by wkjezz
One huge contributing factor to being neat when writing blogs or web pages, is being consistent and often simple.
As many of you may have noticed I have recent re applied a new banner to all of my in date guides to offer a more uniform and un-imposing look, especially as they are on the front page of the website when they are new.
Jiyambi has taken a shining to this and has adopted a similar design. So for you entertainment I have created this short tutorial on how to adapt this into your guide should you so wish.
Getting Started
Although the original design was made using MS Paint (yep.. i went there) I will adapt this concept using one of Wow-pro’s programs of choice Gimp
To download Gimp, open your browser of choice and visit website Http://www.gimp.org and follow the download links and install the version for your Operating system.
Download the Template
I have made a template file to make this easier and quicker for you to do. You can download this here.
Right Click on this Link and Save As
Editing the Template
The first thing we want to do is open our file with gimp. By default the file is called tempforguide.xcf; though you may have renamed this when you downloaded it.
Upon opening the file you should see something like this:
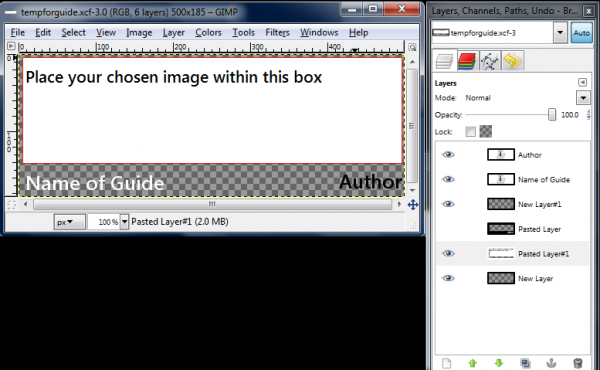
This doesn’t look very much like a good template does it? Well, Let’s start editing. What you want to do now is go back to gimp, and select:
File > New
You should see a new window open in gimp.
The dimensions I used in the template are 500×185, a bit smaller than my original, but that is me being fussy. Go ahead and use 490 x 135 for the new image. For now we will let this rest, we will come back to this
Now you want to select an image for your guide. I want to write a guide on Pandas today, so I am going to find an image of a panda on the internet (be sure it isn’t copyright protected) So using the image category on a search engine (I use yahoo) I type in PANDA and find an image I like. I download this image to my hard drive by right clicking on the image, and selecting Save Image As (most browsers have an option like this)
Here is the image I want to use:

Now open your new image up with GIMP (this should make a 3rd window of gimp)
FILE > OPEN > Select your chosen File
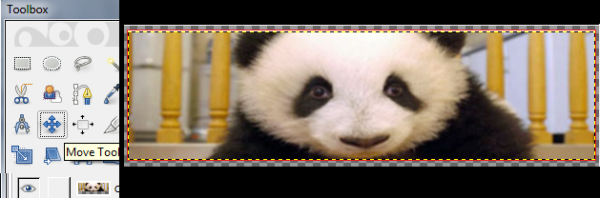
Once this image opens; select all by holding down the CTRL button and then pressing A.
It should look like a bunch of ants are patrolling around your picture. Now you want to hit
EDIT > COPY
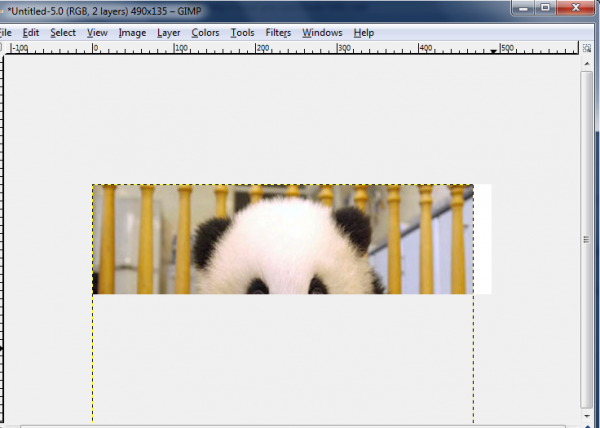
Go to the blank 490×185 GIMP window we created earlier. Now do the following
EDIT > PASTE AS > NEW LAYER
If done properly it ought to look something like this:
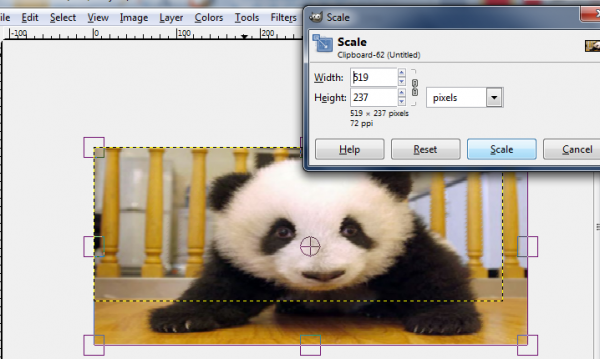
Now you need to reposition, resize and or crop your image. The simplest way to do this is using the scale tool.
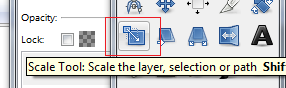
Then it is just a case of dragging the side or corner points on your image to fit. Once you have done this you should see a pop up box appear. It will have the word SCALE on a button, once you are happy, select scale.
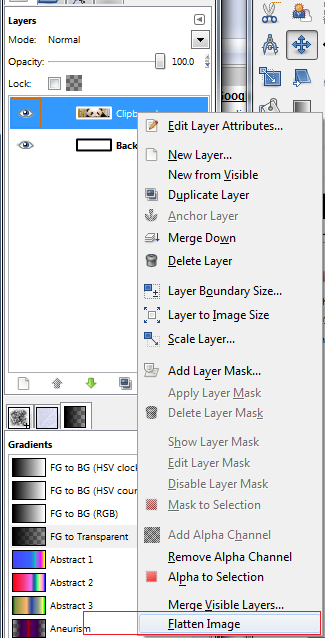
Once this is done, go to your layer window, and right click the top layer and select flatten image.
On the image window go ahead and select all (Ctrl+A) and Copy (Ctrl+C) like we did before. Now you want to select the GIMP windo of the template you downloaded. One this image select
EDIT > PASTE AS > NEW LAYER

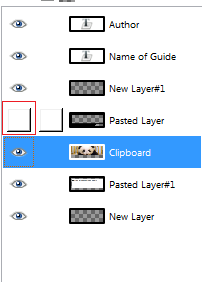
On the layer panel, click and hold the image layer you just pasted, and drag it down so it is the third layer up
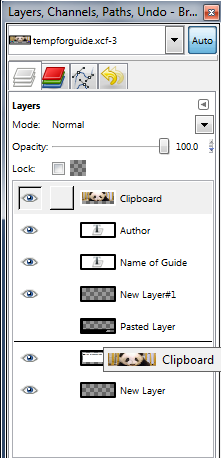
Now select your move tool from the tool box, and then drag the new layer we
created within the red box. It doesn’t have to be exactly up agaisnt the red, but be as close as you can.
On your layer window, go to the 4th layer up, and you should see a gap between two eyeballs. If you mouse over this gap you should see a blank button appear, press this once, and you should see an eyeball appear, and if you look at the image window, you will see the header is taking place. All you need to do now is edit the text!
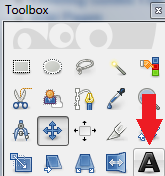
To edit the text, select the layer you want to edit on the layer window, in this case it is “Name of Guide”. Then select the TEXT tool.
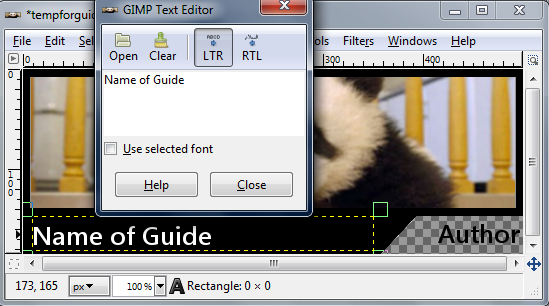
With your cursor click on one of the letters in the words “Name of guide” (you may need to click 2 times) on the image window, If done correctly, you will see a pop-up box, which will allow you to edit your text. Rename this to whatever you wish.
Now go to your layer window, and select the layer called AUTHOR and do the same thing as you did before when renaming the guide.
You should now be done! 😀
You now want to do the following;
FILE > SAVE AS > then name the file and add the extention PNG at the end, for example PANDAS.PNG and you should have something that looks a little like this

If this text guide is hard for you to follow, or you need an extra reference point. I did make a short video capture of me following the steps of this tutorial. Please enjoy.
Hahah! Win! :DHahah! Win! 😀 😀 😀
I LOVED trapdoorgrowing up, and I LOVE this remix, you might like it
And here is a pic you might like, my your avatar vs my avatar; lulz
[img]https://wow-pro.com/files/birk.jpg[/img]
[url=http://www.youtube.com/embed/L5Z7QU8eQ6w?]Trapdoor Remix[/url]
Wkjezz… your avatarWkjezz… your avatar inspired a twitter fest of 80s and 90s cartoon songs… thanks to Keeva from [url=http://treebarkjacket.com/]Tree Bark Jacket[/url]. Just thought you should know that you’ve inspired more than your yearly allotment of shenanigans this morning…
My work here… is doneMy work here… is done
Bastard! I can’t stopBastard! I can’t stop laughing! 😛
Epic sir.
-Skum
Hahahahahahahahaha
OMGHahahahahahahahaha
OMG there is so much win in that.
I was going to use this…But it might be just a bit TOO silly 😛
[img]https://wow-pro.com/files/skum.png[/img]
Awesome guide is Awesome, asAwesome guide is Awesome, as always 🙂
Nice one Wkjezz!
-Skum
Video SupportYoutube is being a [color=#800080][size=48]big silly[/size][/color] right now; so I have temporarily removed the video embed until it sorts itself out.