
 by Jame
Stratholme Guide
Introduction
Stratholme is one of the hardest instances designed for a single group, if not, the hardest instance. It is also the most rewarding in terms of loot (you can get your class set Leggins with a single group). Some of the quest lines yield amazing rewards too. Stratholme is divided into two part, The undead side and the Live side (full of fanatics from the Scarlet crusade). So I will be dividing this walkthrough into 2 parts, starting with the live side, since this is where you should start anyway if you follow the quest progression of Stratholme.
Quests
Both:
Quests marked in Orange are the quests you should have before entering Stratholme the first time.
- [61] The Great Fras Siabi (Dungeon), given by Smokey LaRue at the Light’s Hope Chapel (Eastern Plaguelands) It will be described later on in the walkthrough.
- [61] Houses of the Holy (Dungeon), given by Leonid Barthalomew the Revered at the Light’s Hope Chapel (Eastern Plaguelands). You will find the Holy Water in supply crates in stratholme. They are scattered everywhere on the floor inside Stratholme, be warned though, most of the crates are traps (spawns a dozen of maggots, rats, etc… easily killed with a couple of AEs though)
- [61] The Flesh Does Not Lie (Dungeon), given by Betina Bigglezink Light’s Hope Chapel (Eastern Plaguelands). The Plagued Flesh samples can be found on any ghoul type of mobs, also can be found on Scarab types, on Abominations and on some nameds. The follow up for this quest is:
- — [61] The Active Agent (Dungeon), given by Betina Bigglezink Light’s Hope Chapel (Eastern Plaguelands), after completing the quest above. The Scourge Data can be found in a little box, in one of the three Ziggurats in the Gauntlet area (Undead side), this will be described later on in the guide.
- [61] The Restless Souls (Dungeon), given by Egan, you can find Egan in the last house west of the Plaguewoods (Eastern Plaguelands). But first you have to get the initial quest from Caretaker Alen, who is located just a bit south of the Light’s hope chapel. After getting the quest, you will be sent to talk to, and you will get a Gun, Egan’s Blaster. In Stratholme, you will find non-agressive NPCs named ”Ghostly Citizen”. Blast them away with the gun, and they will split into multiple Restless Souls, blast those souls away one by one to free them.
- [60] Of love and family (Dungeon),, this quest is obtained after doing all the quests given by Tirion Fordring. You can find Tirion Fordring in Western Plaguelands, follow the Thondoril River north (close to the bridge to Eastern Plaguelands), he is standing infront of a little house east of the river. Do all the quests he gives you, then he will talk to you, go through the dialog and then he will give you [57] Of lost Forgotten Memories, then [58] Of Lost Honor, and then finally [60] Of Love and Family (Dungeon). The painting you have to find is located at the end of the Scarlet area inside Stratholme, in the room for the Archivist. It will be described later in the walkthrough. After this quest is complete you will have a final step to perform, which you can do solo. Then you will get the final rewards of that long serie of quest, they are really amazing.
- [61] The Archivist (Dungeon), Main quest line and most important one in stratholme. Given by Duke Nicholas ZverenHoff at the Light’s Hope Chapel (Eastern Plaguelands). It will be described in details in the walkthrough. This quest has a follow up:
- — [62] The Truth Comes Crashing Down, after you have completed The Archivist, if you go back to the Scarlet bastion and defeat the last boss there again (Balnazzar), he will drop a head. The Head of Balnazzar starts this quest. You will go talk to Duke Nicholas Zverenhoff again, and he will give you the last follow up quest:
- — [62] Above and Beyond (Dungeon), your goal will be to kill Baron Rivendare himself, at the end of the Undead side. It will be your hardest fight, and the rewards will be great. After you got the Head of Baron Rivendare, go back to Duke Nicholas ZverenHoff, complete the quest, he will then send you to the commander of the Argent Dawn: Lord Maxwell Tyrosus. Talk to Lord Maxwell, complete the quest, and you will then have access to the Argent Hold (a chest on the floor next to Lord Maxwell) where you will find your final rewards.
- [60] The Medallion of Faith (Dungeon), this quest is started inside Stratholme. And you don’t need to accept any quest, it is just a ‘Get the item and turn it in’ quest. You will have to find a Medaillon of Faith, in a chest guarded by Malor the Zealous, in the Scarlet bastion. Once you have the medaillon, you will have to give it to Aurius, a Paladin you can find in the first house you see when entering Stratholme through the Service gate. If you give the Medaillon to Aurius, he will come to your aid when you fight Baron Rivendare later on. And after the Baron is defeated, Aurius will have a quest up for you, complete it instantly to get great rewards.
Horde:
- [62] Ramstein (Dungeon), given by Nathanos Blightcaller at the Marry’s Stead in Eastern Plaguelands. To find the Marry’s stead, when entering Eastern plaguelands from Western plaguelands, follow the road east for a little bit, then the marry’s stead will be just north of the road. Before getting [62] Ramstein from Nathanos, you will have to complete a serie of quests: [58] To kill with purpose, [60] Ranger Lord’s Behest, and then you will get the follow up [60] Duskwing, Oh How I Hate Thee… (Elite), you will need help for that one, Duskwing is an Elite lvl 60 Bat, has a lot of HPs and hits fairly hard. You can find Duskwind roaming around east of the Marry’s stead. After you complete the quest you will finally get the final one: Ramstein. You will find Ramstein as one of the last guardians before Baron Rivendare, at the end of the Undead side.
Walkthrough: The Live Side
Group Composition
Warrior or Paladin (prot speced), Priest and Mage are a must have, if you want to be able to do everything including Baron Rivendare. Polymorph makes live side very much easier. Instant Arcane Explosion is extremely helpful in every area of the instance. If you can’t get a mage, get a Warlock, they are the best replacement for mage, it will be still possible, but much harder. Priest is really the best choice for healer especially in Stratholme, thanks to Shackle Undead.
Other than that, get a backup healer (Shaman, Paly, Druid) and some DPS (Rogue, Hunter, Mage, or even warlock).
Note: You will need the Scarlet Key (obtained from the Scarlet Monastery instance, check the guide for it, in the Library section) or a rogue with high lockpick skill.
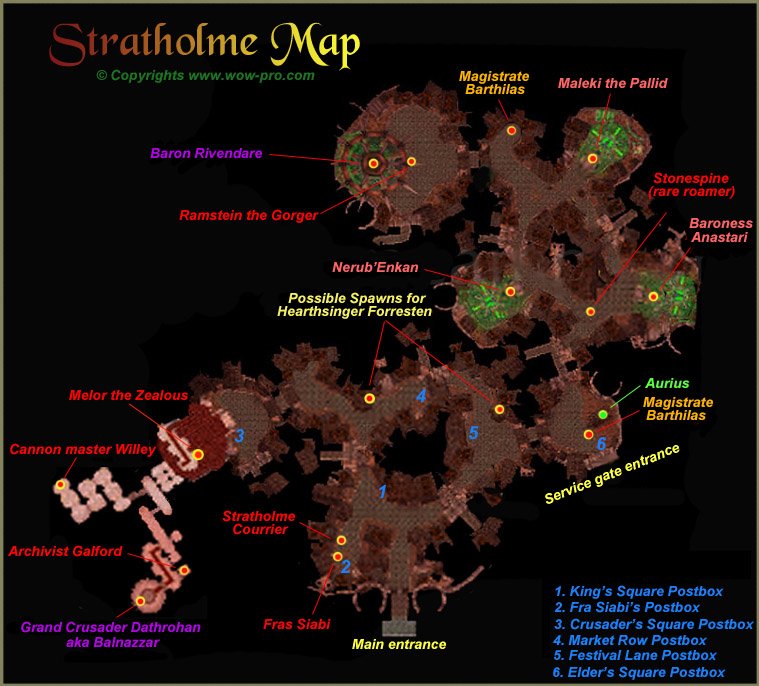
Where: Since we are starting with the live side, you will enter Stratholme by the main entrance. (anyway the Service gate is only accessible once you have the Key to the City, or a rogue with high lockpick skill)
1. To the Great Fras Siabi
The first pulls in Stratholme are AE (area effect) pulls. They are composed of 1-3 Elite mobs and a bunch of normal ones. Have your tank pull them, get them in a bunch and use every AE spells your group has to blast them away as fast as possible. You can also have your priest Shackle pull to have one elite mob less to deal with, if you feel safer that way.
You will most likely already find your first Ghostly Citizens after a few pulls, don’t forget to use your Egan’s Blaster on them and to blast the restless souls as well.
Warning: Every now and then, an Eye of Naxxramas will appear and /yell The living are here!. Kill it instantly or he will summon 2 lvl 60 Elite garoyles. So be on the watch for those Eyes.
You will soon reach a fork. To the right is on the way to the Gauntlet area, and requires Key to the city. This doesn’t interest you for now, so go left. Watch out for the Abomination roamer, and pull it solo. They are already hard enough to deal with solo. Clear the way left up until the next fork, and actually start clearing the whole area to the right and to the left. For one simple reason, when you trigger Fras Siabi, they will all aggro, he has a huge Call-for-help range. To the left you will find a crate named ”Fras Siabi Tobacco”. When opening the crate, Fras Siabi will appear and attack you. He is an easy fight. After he’s dead, loot the Siabi’s Premium Tobacco from the corpse. You just completed your first quest. Also close to Fras Siabi you will find the Stratholme Courrier…
2. The Stratholme Courrier and Posmaster Malown (OPTIONAL)
The stratholme courrier randomly drops 3 keys, those keys can open 3 of the 6 Postboxes scattered in stratholme. Check the map for their locations. Everytime you open one of the postboxes, 3 Undead Postman spawn and attack you. They are elite, but can be shackled and aren’t very hard. In postboxes you will find documents and various letters, it’s junk you can just sell to vendor.
When you open your 3rd and last postbox, Postmaster Malown will appear, as well as 3 Undead Postman. The key to win this fight is to Shackle Malown and focus on the 3 Postmen, once they are dead. Deal with malown, he is easy once he is alone. Malown is totally optional and not included in any quests, but he drops good stuff. Namely magister boots, and also a cloth armor set (The Postmaster), with very nice stats if you get the chance to gather the whole set. (That’s a lot of work though).
3. To the Scarlet Bastion
So you are at the Fras Siabi spot and wondering where to go? Go North, up until you reach a double iron gate. Caution, this gate is a trap, it closes right after you step in between the 2 gates, and then a huge swarm of Plague rats attacks you. So coordinate your group so all of it moves in between the 2 gates at the same time. Kill the rats with a few AEs.
Past the gate you will reach another fork, you will go left. Keep on clearing your way left, also be aware that there is another Patchwork Horror (abomination) roaming around here. You will then reach the Live area, and find scarlet crusade NPCs hiding behind crates, in a state of siege.
The pulling style becomes different here, no more AEing. Back to regular pulling, sheeping, sapping, assisting. Also worth mentioning, those mobs run away in fear
The Crimson Conjurors are annoying and summon pets. So either kill them first or sheep them and save them for last. Just do not let them loose, they summon elementals.
The Crimson Guardsmen are also very annoying, they knockback and shield bash. So make sure you position yourself so your back is always facing a nearby wall, or you might get tossed into adds.
Clear the way until you reach the entrance of the bastion. Once you have done so, don’t open the door, wait a little and you will see Timmy the Cruel spawn, kill him if you are interested in one of the following items.
4. The Scarlet Bastion
Open the door with your Scarlet Key or have a rogue lockpick it. Enter the first hall and on your right will be a few mobs. Pull and kill them.
From now on, you have to be extremely careful, and follow the following rules:
- 1. Always pull mobs way back, so you have enough room to recover if they run away in fear.
- 2. EVERY corridor has a patrol (2 mobs) moving back and forth quickly in each of those corridors. They respawn every 30 minutes.
- 3. Take your time before pulling, check on the patrol and try to pull it as soon as possible, so you won’t be bothered by it anymore.
- 4. Every now and then, the scourge will break into the Bastion. You will hear a zone shout to warn you about it. ”The scourge has broken into our bastion” A bunch of skeletons will come from behind, AE them. They are easy, but it can be bad if they come while you are already fighting a bunch of scarlet minions.
- 5. At the end of every big corridor, after killing the last bunch of mobs, extra Scarlet mobs will pop and move in. There will be a zone shout of the like ”Don’t let them break the lines, blabla”. So watch out for those too. You can avoid aggro’ing them if you pulled the last bunch of mobs in the corridor far away enough.
To the left after you are done clearing the first corrider, you will find Malor the Zealous in the side room. He’s an easy kill.
On the floor in Malor’s room, you will find a brown chest that contains the Medaillon of Valor, this item you will need in the Undead side at the beginning when entering by the service gate. It is only worth it to turn in that Medaillon when you are sure that your group is going for Baron Rivendare. If not it is a waste.
5. Cannon Master Willey
When reaching the 3rd corridor, you will be facing a gate, you can open it with the Scarlet key. Go there if you want to kill Cannon Master Willey, he is optional, but he drops Shadowcraft Spaulders, and plans for Heartseeker. If you have a rogue in your group he will probably beg you to go there!
You will have to deal with:
- Crimson Defenders (annoying paladin mobs with stuns, but not much of a threat)
- Crimson Priests (extremely annoying healers, sheep them or interupt their heals as much as possible)
- Crimson Sorcerers (those case Polymorph and arcane explosion, so they can be a threat too)
- Crimson Battle Mage (those really hurt, lots of AE power, they should be your priority, unless you sheep them and save them for last)
There is also a patrol in the Cannoneer area, and they go as far as up the stairs leading to the door. So be patient and kill this patrol before you start pulling your way in there.
After a good part of the room has been pulled, you can go downstairs. Also, you will find the Crimson Hammersmith somewhere in this area. This NPC is needed for blacksmiths who wish to specialize in Hammersmithing.
At the end of this mini-wing, you will find Cannon Master Willey, standing behind two cannons, and surrounded by piles of cannonballs.
As soon as you engage Willey, a bunch of Crimson Rifleman will spawn in the back and will start shooting at your group. The key to this fight is to have one person handle the cannons while the rest of the group kills Willey.
To use the cannons, you need to loot those piles of cannonballs, and then click on the cannons. They do a huge area effect damage, but you have limited shots, so use them well. Try to wait until there is a huge bunch of those riflemen and then fire at will. So give this task to only one person (not the tank or the healer 🙄 )
He can drop several interesting items:
Willey’s Portable Howitzer
Master Cannoneer Boots
Shadowcraft Spaulders
Also the plans to make Heartseeker
6. The Archivist
After defeating Cannon Master Willey, go back and up the stairs, then go to the next door. Open it with Scarlet Key or rogue picklock, but be careful, next corridor’s patrol roams very close to that door, so with bad timing you could aggro them upon opening the door.
At the end of this corridor, to the left will be Archivist Galford, to the right will be Grand Crusader Dathrohan.
We will first deal with the Archivist:
- He uses a lot of AE spells so be as far away as you can from him, unless you are a melee class (warrior/rogue).
- He also casts something called ‘Engulfing flames’, it is a DOT that does quite nice damage but also makes you unable to act while you are burning. It can be DISPELLED so watch out for it.
Other than that he is not that hard. Once he dies, don’t forget to go in his room and to righ-click the archives, to burn them. That way you will complete the very important quest: [61] The Archivist.
In the archivist room, on the right, is also the painting you need to complete the quest [60]Of love and family. Don’t forget to get it.
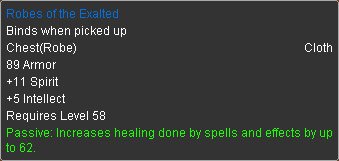
Archivist Galford mostly drops crap besides the priest’s set gloves:
In the opposite room is the big boss of the Scarlet Crusade…
7. Grand Crusader Dathrohan (aka Balnazzar):
At first, you will wonder how can the last boss be so easy! He will go down to 40% HP quite easily, and this is when something really cool happens. He transforms into balnazzar, a huge dreadlord. The Scarlet Crusade is actually being led by a major agent of the Burning legion..
Anyway, Balnazzar hits hard, has a lot of HPs, and a few annoying abilities. He casts Fear and charm.
You can’t dispel the charm, so just keep in mind your healer might be charmed and unable to heal you sometimes so save your Healing Potions or any survival ability (Last Stand, Shield Wall, Evasion, etc) for when that happens. Fight him at the back of his room (because an army of skeletons has invaded the bastion, up to his room) and you should have no problem. He is a tough fight but there is no trick about it besides everyone must pay attention and give his best.
Once he dies, if you have completed the Archivist quest (and by completed, I mean you have to go turn it in with Duke Nicholas Zverenhoff), you will find the Head of Balnazzar on the corpse, and this head starts the quest that takes you to the undead side, or more exactly, the Gauntlet area.
So you will need to go up until the end of the Scarlet area twice at least. Once to finish the Archivist quest, and the 2nd time (don’t forget to reset the instance if you do it twice in a row) to kill Balnazzar again and get the head to drop. I recommend Hearthing out or getting a portal to Undercity, or even suicide and talk to the spirit healer, rather than clearing your way out. Because as I said earlier, after you fight Balnazzar, the Scarlet bastion will be invaded by an army of skeletons, it is part of the script.
Balnazzar can drop the following items:
Crown of Tyranny
Demonshear
Fire Striders
Gift of the elven magi
Lightforge boots
Star of Mystaria
Wrymtongue Shoulders
As well as two extremely rare drop recipes:
Pattern: Truefaith Vestments
Recipe: Flask of Distilled wisdom
Once you have the head of Balnazzar, you are basically done with the Live side, unless you want to go back there to get some of the loots.
Walkthrough: The Undead Side
By now you should have gotten the head of Balnazzar, as well as the follow up quest [62] Above and Beyond (Dungeon)
Your main goal is to kill Baron Rivendare, but for that, you need access to the Gauntlet area. For that you need either a rogue with maxed picklock skill, or a Key to the City. With either of the above, you can enter Stratholme by the Service gate, located east of the main entrance, go directly to chapter 9. in that case. If you don’t, then you will have to get a key, and for that you need to kill Magistrate Barthilas. Here is how you get to him from the main entrance:
8. To magistrate Barthilas
From the main entrance, go the same way as if you were going to the Scarlet bastion. Besides, at the last fork, instead of going left, go right. You will pass the Market Row Postbox soon, after this will be a gate on with a rat swarm trap. Keep going until you reach the Festival Lane area, and go left past a large gate. You will see a wooden house and Magistrate Barthilas will be right infront of it, close to the Elder Square Postbox.
When you engage Magistrate Barthilas, the gate closes behind you, so make sur your whole group is on the right side of the gate before you aggro Barthilas.
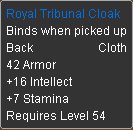
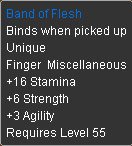
He is a simple fight, hits hard and has only one annoying ability, he knockbacks and loses aggro. Your tank must be ready to run and taunt, that’s it. He can drop a very good cloak:
And most importantly, he drops the Key to the City.
Warning: Only one key drops per magistrate and only ONE person can see the key on the corpse at first. So make sure EVERYBODY checks the corpse, and after that has been done, everybody will be able to see the key on the corpse. You only need one person with the key per group to open the doors.
9. To the Gauntlet
If you came through the service gate entrance, you won’t find Magistrate Barthilas here. He will shout that intruders came through the Service gate, and you will find him later on close to the Slaughterhouse area.
You are right now at the elder square’s area. In the wooden house you will find Aurius, that Paladin NPC who needs the Medaillon of Faith. If your group is heading for Baron Rivendare and has the power to kill him, then give the Medaillon to Aurius. He will come to your help when you will be fighting the Baron, and reward your whole group with some good items if you suceed.
Head north to the Gauntlet area, you will have to open a couple of gates and you will be there. The Gauntlet area is a Triangle area, with a Ziggurat in each of the three corner. Each of the Ziggurat is guarded by a Boss, you must defeat those 3 bosses and kill the Acolytes inside the ziggurats to destroy the crystals. Once you have destroyed the 3 crystals, the gate to the Slaughterhouse will open up. Let’s get started with the first boss.
10. Nerub’Enkan
Start with pulling the Gargoyle roamers, be careful with the Rockwing Screechers, they cast AE fear. You don’t want to get feared into more adds, so pull them as close as possible to the gate behind you.
Those Gargoyle roamers are on a 30min respawn timer, so be quick.
Start pulling toward the left then, the banshees cast AE silence, so if you get several mobs in a pull including a banshee, you might want to Shackle Undead them.
The Scarabs cast Net which is a Root + Silence. So watch out for that if you main healer is silenced.
Pull the 3 ghouls on the left once you have cleared most of the Banshees and Scarabs in the middle. The ghouls are also on a 30 Min respawn timer. So it’s better if you kill them last.
Move your group to where the 3 Ghouls were, this is where you will be pulling the last bunch of mobs that are between you and the first Ziggurat. You will have to pull a couple of humanoids. Thuzadin Shadowcasters and Thuzadin Necromancers are the two types of humanoids you will find there. Watch out with the Necromancers, they drain mana and drain life for quite a bit. Keep them interrupted and stunned as much as possible.
Once you have a clear path to Nerub’Enkan, pull him to the 3 Ghoul spot where you already were. Nerub’Enkan doesn’t hit really hard, but has a good amount of HP and one annoying ability: He summons little scarabs.
Ignore the mini-scarabs for the most part, focus on getting Nerub’Enkan dead. If possible have your tank get aggro on the scarabs (quickly switch to them, hit taunt and sunder armor once or twice should be enough). If you start to get overwhelmed by scarabs (4 or more), have your mage / warlock AE them. They don’t have much HPs and should die quickly.
Nerub’Enkan is one of the easiest bosses in Stratholme so you shouldn’t have much problems.
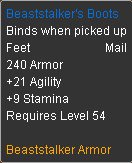
He can sometimes drop the Husk of Nerub’enkan
and the Hunter’s set boots:
Once he is dead, go inside the ziggurat and kill the Thuzadin Acolytes — They are weak, can be killed with a bunch of AEs.
After that is done, you will get a zone shout ”A Crystal has been destroyed, blabla”.
Note: If you have the quest [61] The Active Agent (Dungeon), the Scourge data might be inside this Ziggurat, in a little chest on the floor. It can be in any of the 3 Ziggurats, so you will have to check them all.
Go back to the entrance of the gauntlet area, and start heading to the 2nd boss: Baroness Anastari.
11. Baroness Anastari
Baroness Anastari is one of the hardest fight for a 5-man party, I would say the 2nd hardest fight after Baron Rivendare. It is also the most unpredictable fight ever.
Start clearing toward her, and pull the area on the right side of her Ziggurat, there will be about 4 Humanoid casters and a Banshee. You can pull the casters without the banshee, they are already hard enough especially with the necromancers. When those are dead take their spot, this is where you will be fighting the Baroness.
Also, if you have a Blacksmith who wishes to specialize in Swordsmithing in your group, on the floor are plans for it. When you click those plans, an undead smith will attack your group. It’s just a normal lvl 60 elite undead.
Before pulling the Baroness Anastari, clear a large area around you. You will need space, she will most likely charm your warrior, priest, warlock and use AE fear and such abilities. So you need a lot of space to fight her. She is already hard enough, you don’t want any adds during the fight.
- She has a single attack, shadow based apparently. That does around 800dmg.
- She also casts AE silence sometimes, the range isn’t very big but still not neglectable.
- Now the killer abilty: She takes control of someone’s body. She will be INSIDE the person’s character and using all his abilities (especially the long cooldown ones, so you might as well use them as fast as you can before she possesses you).
To get the Baroness out of the person’s body, you need to get his HPs down to 25-30%. The person will then be fred, but appear with extremely low HP.
Warning: When the person gets close to 30%, don’t use nukes or any high damage abilities. Go very slow on the dps until the person is released, or you will actually finish him off. It is the KEY to win this fight.
The 2nd key to win this fight, is that as soon as she appears out of someone’s body, she will cast AE silence instanly. So that means 2 things:
- The healers must be far away so they don’t get silenced
- They must immediatly heal the person who just got released (Power shield helps a lot)
She will charm several persons in the group, one by one, randomly. Be warned, this fight is all about NOT finishing off the charmed person and for that you need to control your dps AND to have competent healers who manage to avoid getting silenced AND to immediatly Shield/Heal the person released.
When she is in her real form, go FULL DPS, this is the only moment when you can actually hurt her.
All in all, a very fun fight, but it can get frustrating, so prepare for failing it a few times until everyone gets the drill. (They announced they would make it easier in the next patch though, so until then, have fun with it 🙄 )
She can drop the following item, rarely:
and the warlock’s set boots:
Don’t forget to kill the Acolytes inside the Ziggurat and to check on for the Scourge Data if you need it.
Now on to the last Ziggurat and it’s guardian: Maleki the Pallid.
12. Maleki the Pallid
On the way down to the last Ziggurat is another one of those Swarm rat traps. They ll be coming through a closed iron gate on the right. Be very careful if you get a Rockwing Screecher there, don’t fight it close to that gate, because if you get feared through it, you won’t be stuck behind it. It is a known bug that hasn’t been fixed yet. So just avoid fighting those Gargoyles anywhere close to that iron gate.
Pull your way toward the last named, Maleki. You can pull the 3 Humanoids on the stairs up to him, he won’t aggro. You will get him solo and he is quite easy, he is a necromancer npc, drains mana and life, casts some curses and nukes. He is one of the easiest nameds in Stratholme.
He can drop Skull of Burning Shadows and the Plans for Hammer of the Titans
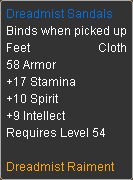
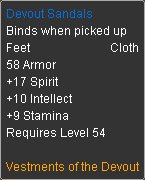
More importantly he can sometimes drop the Priest’s set boots:
Don’t forget to kill the Thuzadin Acolytes inside the Ziggurat and to check for the Scourge Data if you need them.
After the 3rd Ziggurat is destroyed, you will get a zone shout, saying that the way to the Slaughterhouse is now open. Head towards there, you will find magistrate Barthilas in the corner if you entered Stratholme by the Service gate. Feel free to kill him for an extra key.
Then have your WHOLE group move past the gate of the slaughterhouse, because, as soon as you will aggro the first abomination there, the gate will close behind you. So make sure everyone is inside before doing anything.
13. The Slaughterhouse
Get full mana and refresh your buffs. Because when you will pull your first abomination, they will start to auto-pull themselves. You will be fighting Bile Spewers and Venom Belchers (both abomination type) non-stop, with little breaks sometimes. Use those to drink immediatly.
After killing your last abomination, Ramstein the Gorger will walk towards you. He hits hard and can take quite a beating. But the most annoying thing about him is that he tosses your tank in the air, stunning it for 3 seconds, and loses aggro. It can’t be helped, he will beat on the casters for a few seconds until your tank gets back and taunts him off.
Besides that, he isn’t that hard. He can drop some nice items, those in particular:

Don’t forget to loot the Head of Ramstein the Gorger.
Don’t be thinking it’s over though, right after Ramstein bites the dust, a massive swarm of skeletons will rush for your group. They got very low HPs though, AE them.
As soon as they are dead, drink as fast as you can. 5 Elite lvl 60 Skeletons are marching your way.
Shackle one, use Hunter freezing trap if you have, and pray that your warrior is good enough to keep aggro on multiple targets. Assist kill them one by one.
If you survive through all of this, you can chill, go loot the crates scattered around (most are traps though), and prepare for your last and biggest fight.
14. Baron Rivendare
You can move your group into his room, he has a ridiculous aggro range. Move in and go into one of the corner opposite of Baron. While doing that you will notice that he has an Aura. This aura has quite a wide range and does damage every 2 seconds. So you guess it, only the melees (Warrior / rogue) are allowed to be in the Aura range. The rest of the group can nuke and heal safely from the corner.
The warrior will at the beginning of the fight charge Rivendare, and position him so the Aura doesn’t hit the rest of the group, while being in range for heals.
Now the baron alone is quite the tank, he has a ton of HPs, and he dishes a lot of damage on the warrior already. He also uses Mortal strike, making it a very mana intensive fight for a priest.
Basically, the priest will have to fully focus on healing the warrior, and do nothing else, or he will probably be out of mana before the end of the fight.
Special ability: Every now and then (about every 15 seconds), Baron Rivendare will summon 6 skeletons, they will rise from each of the 6 piles of bones scattered in the room. They will go for the warrior but immediatly run for the Priest after the first heal. They got low HP and must be killed EXTREMELY FAST by the Mage or the warlock with AEs.
Here is why they must be killed fast: About 10 seconds after the 6 skeletons are summoned, Baron Rivendare will cast Death Pact. That means he will get healed for every skeleton still alive. And that heals him for quite a lot. You CANNOT afford to let him heal a single time, the fight has been caculated to be very mana intensive for a single group. If you let him heal once from those skeletons, your healers will most likely be out of mana before the Baron Dies.
So this is the KEY to win this fight: The mages (or the warlock) must be really quick, as soon as they see those Skeletons being summoned, they must dash for them, AE them to death, then go back to safe spot with the healers.
You should have a backup healer in your group as well: Paladin, Shaman or Druid. Their roles will be: To heal the rogue(s) if there is one (because they will be taking damage from the Aura). To Heal the mage / warlock while they are AEing skeletons, and to backup heal on the tank after a mortal strike if they see a need. A good secondary healer is a great help on Baron rivendare. Their mana regen skills (Innervate, Seals, Totems) will be a great help for this battle too.
Keep all of that in mind and you will make it, you might need a couple of tries till everyone gets the drill, because it is really a tough fight for a single group. But it is far from being impossible.
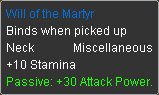
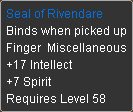
Aurius, this weak paladin, will join mid-fight too, if you gave him the Medaillon of Faith before. He is little to no help, but anyway, if you defeat the baron, go talk to Aurius, he will let you choose between the following rewards:
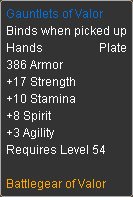
Baron Rivendare himself has quite a large loot pool, including ALL the class set leggings. He will always drop one of the legs and one of the following items too:
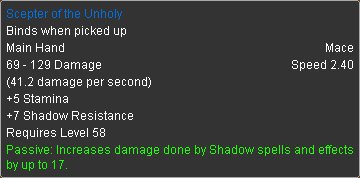
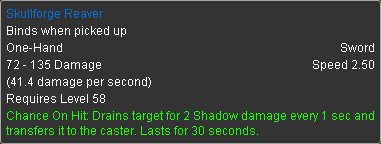
And if you are really lucky you might get the jackpot:
This awesome blade:

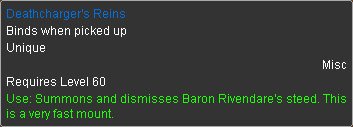
Or a free 100% speed increase mount, with a unique look (actually looks exactly like Baron Rivendare’s Steed):
Also, do not forget to loot the Head of Baron Rivendare, you will then complete the final quest. Go to the Light’s hope chapel and talk to Lord Maxwell Tyrosus, he will give you access to the argent hold (a chest next to him), where you will get your final reward inside the chest. You will get to choose between two very good weapons (especially an amazing caster Staff) and a shield. Enjoy!
I hope you liked this Stratholme guide, and that it will help you to clear the whole instance with a 5-man group. It can be a lot of fun to clear the whole place with a single party, and very rewarding too. Not to mention, Blizzard announced that a lot more items are gonna be added to stratholme in the next patch, making it even more worth visiting!
If there is anything lacking or unclear in this guide, please let me know, I will update as fast as possible 🙂
Thanks for reading!
-Jame
© Copyrights www.wow-pro.com All rights reserved.
Needs an updateWe are recently working on improving the quality of content here on WoW-Pro.com, both by limiting low ranked guides and by moving out of date guides into archives. For more information, see [url=https://www.wow-pro.com/node/3016]the full news post detailing this process[/url].
This guide needs an update to make sure it is current with patch 4.0. However it still has enough useful information that it will be left in it’s proper section as-is.
This instance is getting a major overhaul in Cataclysm, and the guide will need to be updated then or it will be moved to the archive.
If someone else would like to adopt the guide, or if you have any questions about this process, feel free to comment here.
Tirion FordringHello and first let me say thanks for the incredible guides over the years. Especially these level 60 instances.
The Strat guide should be corrected to read that Tirion Fordring is in fact in Eastern Plague Lands. You are best served to jump in the water from WPL and then swim across the river. When you do that you will be in EPL on EPL’s Map and so will Tirion Fordring.
Just a small addition for those spending time running around in the mountains of northern WPL asking “Why would they put a house here?”
Magister bootsThe Magister boots for the Mage Dungeon set do not drop from Malown anymore but from Heartsinger.