 by Jame
Many guides get submited on wow-pro everyday, but very few are actually good enough to be published.
Many guides get submited on wow-pro everyday, but very few are actually good enough to be published. Here are a few guidelines you should follow before you write a guide, I’ve tried to keep it as short as possible.
Table of Contents
- Choosing a Topic – Step 1
- Choosing a Topic – Step 2
- Creating your Guide
- Spellchecking
- Text Formatting
- Images
- Seperate your Guide into Parts
- Wowhead Tooltips
- Creating a Table of Content
1. Choose the topic of your guide very carefully, ask yourself these questions:
a) Do I have superior knowledge about this topic?
For example, do you think it’s a good idea to write a mage guide if you’ve only played a mage up to level 42 or something?
b) Will my information be helpful to other players?
Don’t state the obvious. For example, don’t make a 5-liner guide stating “If you want to make gold, go kill mobs and sell what you find. Try to sell things at the AH at the highest possible price”. Seriously, who needs such a guide? 😛
In short, try to write a guide about something most people don’t already know.
 Back to the top
2. Once you’ve chosen the topic of your guide, don’t start writing yet, check the following things first:
a) Did someone already write a guide on this topic? Browse the Guides library to find out.
b) Is someone currently working on a similar project? Check the Needed Guides list to find out.
c) If someone already wrote a guide on this topic, ask yourself this question:
- Will my guide be better than this one? Significantly better? If yes, then go to the next paragraph
- If not, then go back to paragraph 1. and choose a different topic for your guide
3. Create your guide, put it in the right category and start working on it:
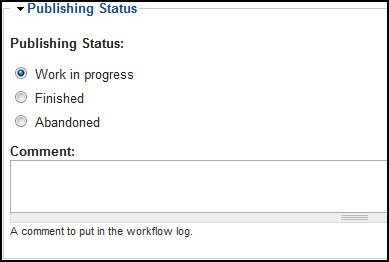
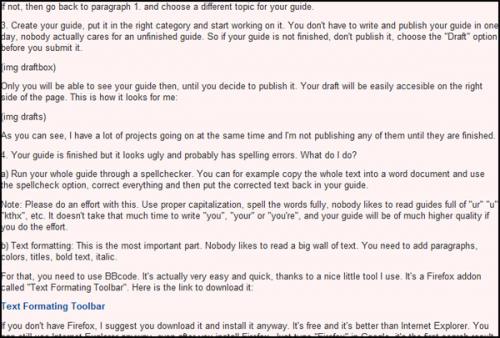
You don’t have to write and publish your guide in one day, nobody actually cares for an unfinished guide. So if your guide is not finished, don’t publish it, choose the “Work in Progress” option before you submit it.
Only you and the admins will be able to see your guide then, until you decide to publish it. Your draft will be easily accessible on the right side of the page. This is how it looks for me:
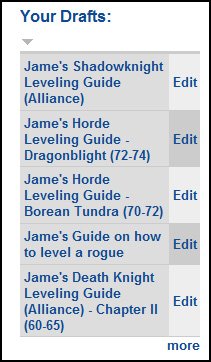
As you can see, I have a lot of projects going on at the same time and I’m not publishing any of them until they are finished.
Once you’re done writing your guide, there are still things you should do to make it worth being published. Please read on.
Run your whole guide through a spell checker. It’s easy, just copy the whole text into a word document or in your e-mail program and use the “Check Spelling” option, correct everything and then put the corrected text back in your guide.
==Note== Please do an effort with this. Use proper capitalization, spell the words entirely, nobody likes to read guides full of “ur” “u” “kthx“, etc. It doesn’t take that much time to write “you”, “your” or “you’re”, and your guide will be of much higher quality if you do this effort.
This is the most important part. Nobody likes to read a big wall of text. You need to add paragraphs, colors, titles, bold text, italic.
For that, you need to use BBcode. It’s actually very easy and quick, thanks to a nice little tool I use. It’s a Firefox addon called “Text Formatting Toolbar“. Here is the link to download it:
If you don’t have Firefox, I suggest you download it and install it anyway. It’s free and it’s better than Internet Explorer. You can still use Internet Explorer as your main browser, even after you install Firefox. Just type “Firefox” in Google, it will be the first search result.
Once you have installed it, you’ll have the following toolbar on top of your browser:
As you can see, I’m using it right now as I’m writing this guide. It’s extremely easy to use, just like a normal text editing program, you just have to select the text you want to format and then click on the icon.
Now tell me, would you rather have this version of my guide:
Or the one you’re currently reading?
I think the answer is clear and it shows how much of an improvement a little bit of text formatting can bring to a guide.
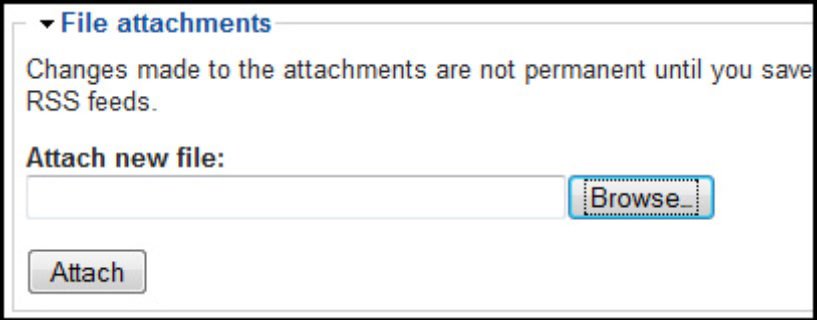
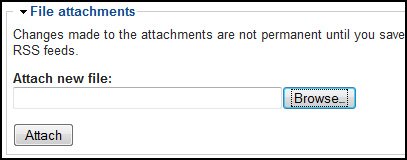
Images are also a nice addition to any guide. Of course, you must not add images for the sake of adding images. They must have a purpose, they must illustrate your content and if possible, make it easier to understand your guide.
Simply go to “File Attachments” and attach the image of your choice:
Once the image is uploaded, copy the link to it:
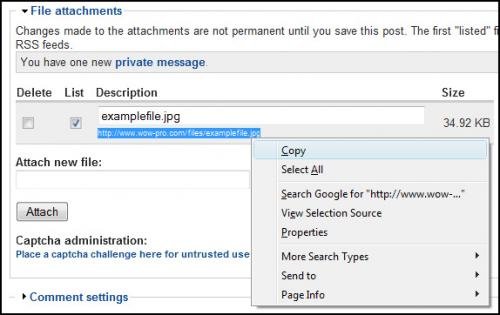
Then paste the link in your guide, add the following BBCode tags around it:
- [ img ] your.link.here [ / img ] (without the spaces of course)
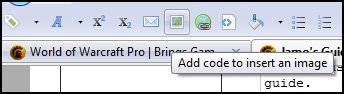
You can also add the img tag with one click thanks to the text formatting toolbar:
And there you go.
If you are STILL having troubles to upload images, please check this short guide: Nilz’ Image Uploading Guide .
==Note== Images must be saved in .JPEG format before you upload them on wow-pro and they must not be too big. The max width of an image should not exceed 600 pixels and if possible, you should try to keep them below 400 pixels. Try to keep the images as small as possible. Images that are too big take a long time to load, take too much space and actually make your guide harder to follow and to print.
7. Seperate your guide into parts
It’s quite easy, simply enter the following code and it will add an horizontal ruler. It’s great to split your guide into different parts. Here’s the code:
[ hr ] (without the spaces)
First, find the item on wowhead. Copy the URL.
Then simply write down the name of the item in your guide (it doesn’t even have to be the name of the item, it can be anything really).
Select that text and click on the “Add code to format text as link” button on the text formatting toolbar (assuming that you have it).
Then simply paste the wowhead URL in the window that pops up.
Example:
If you don’t have the text formatting toolbar, the code is:
[url = http://www.wowhead.com/?item=39769] Super Cool Weapon [ /url ]
(without the spaces of course)
9. Creating a Table of Content
Jiyambi wrote a very nice guide on how to create a Table of Content. You can’t go wrong with it (I used it for this guide :p). Here is the link:
Creating a Table of Contents
And that’s it!
Once you feel that your guide is ready to be published, change the Guide Status to “Finished“!
I’ve covered this topic in details in one of my blog articles as well, I encourage you to read it if you want to know why it is important to follow these guidelines.
If you have any other questions or suggestions regarding guide writing, please read our FAQ. If you don’t find an answer there, please leave a comment here and I’m sure someone will answer you quickly.
Jame’s post is rather old, IJame’s post is rather old, I expect somewhere there is a new toolbar that does the same thing, but in the mean time, sorry you had challenges and it looks like we need to update content here.
Installing the Toolbar issues on FirefoxHello James,Tried to install the toolbar you linked above but I couldn’t because it said it was incompatible with Firefox 25.0.Any suggestions?Thanks, Marveleen